
The Zephyr Project from the Linux Foundation is a small open-source Real-time Operating system (RTOS) for embedded devices supporting different architectures including ARM Cortex-M, Intel x86, ARC, Nios II, Tensilica Xtensa, and RISC-V, and a large number of supported boards. It’s mainly targeted for the Internet of Things (IoT). This article is a step by step guide to install and cross-compile Zephyr with SHAKTI SoCs. In addition to that, it also explains the deployment of Zephyr applications on SHAKTI.
Here, we are going to see a 32-bit version of Zephyr running on Parashu (e-class on Arty7 100t)and Pinaka (e-class on Arty7 35t). The version of the Zephyr kernel is v1.13. The steps are as follows,
1.1 Setting things in Place for Zephyr Build:
Step 1: Prerequisites
- shakti-tools and shakti-sdk installed.
device tree compiler: above 1.4.6python3.7ninja 1.8.2cmake 3.10.2
Note: However, shakti-sdk and shakti-tools are currently a private repository. Please login or sign up to Gitlab and request access here.
Firstly, install the prerequisites and the required software dependencies, Ignore if already installed.
$ sudo apt-get install libpython3.7-dev
$ sudo apt-get install --no-install-recommends git cmake ninja-build gperf ccache doxygen dfu-util python3-ply python3-pip python3-setuptools xz-utils file make gcc-multilib autoconf automake libtool python3-pyelftools python-pyelftools
Step 2: Getting the Zephyr Repository
Then clone the Zephyr repository to your system.
$ git clone https://gitlab.com/shaktiproject/software/zephyr-rtos.git
$ cd zephyr-rtos
$ git checkout shakti-zephyr
Step 3: Getting the requirements
Similarly, install the packages required for Zephyr using a script.
$ pip3 install --user -r scripts/requirements.txt
Step 4: Setting the build environment for Zephyr applications
Copy paste the following lines to .bashrc in your home folder.
unset GNUARMEMB_TOOLCHAIN_PATH
export ZEPHYR_BASE=/path/to/zephyr-rtos
export ZEPHYR_TOOLCHAIN_VARIANT=cross-compile
export CROSS_COMPILE=/path/to/shakti-tools/riscv32/bin/riscv32-unknown-elf-
#Please include the trailing dash
After that run this command on the terminal:
$ source zephyr-env.sh
Once the above steps are done, you are set to start writing applications and building/deploying them on the respective SOC.
1.2 Getting Started with Building your “First Application”
The sample applications are found at path/to/zephyr-rtos/samples/<your-application>.
Structure of a simple application follows the below schema,
<samples>/<your-application>
├── CMakeLists.txt
├── prj.conf
└── src
└── main.c
CMakeLists.txt: This file tells the system where to find the other application files and links the application directory with Zephyr’s CMake build system.
Kernel configuration files: An application has a configuration file (usually called prj.conf) that specifies application-specific values for one or more kernel configuration options.
Application source code files: An application typically provides one or more application-specific files, written in C or assembly language. These files are usually located in a subdirectory called src.
1.3 Building and Running a “Hello World” Application
- Assuming you have set up the base as described in Section 1.1.
- Navigate to the “hello world” application located in samples folder
$ cd zephyr-rtos/samples/hello_world
- Create a “build” folder and follow the following steps to build the application.
Important note: Please make sure only the 32-bit tool-chain path is exported to your bashrc, the following steps do not work if both (64bit and 32bit) the toolchains are exported.
$ mkdir build
$ cd build
#Please make sure, cmake is executed inside the build folder
$ cmake -GNinja -DBOARD=shakti ..
$ ninja
The final elf is at <your-application>/build/zephyr/zephyr.elf
1.4 Deploying Zephyr on E-Class 32 bit
Step 1: Assuming you have programmed the E-Class 32bit bit-stream on Arty7 35t or 100t board, with shakti-sdk and shakti-tools installed on your system. Execute the steps listed below.
Step 2: Now, we are going to use three terminals
Terminal 1: Firstly, Connect to the FPGA board by using the OpenOCD provided by shakti-tools and its respective configuration file. (Read how OpenOCD and RISC-V GDB work together to establish a connection between our PC and the Microprocessor)
For Arty7 100t board,
$ cd shakti-sdk
$ cd ./bsp/third_party/artix7_100t
$ sudo $(which openocd) -f ftdi.cfg
For Arty7 35t board, Goto cd ./bsp/third_party/artix7_35t
Terminal 2: After that, Connect to serial output by using miniterm or gtkterm with the baud rate of 19200.
For instance,
$ sudo miniterm.py /dev/ttyUSB1 19200
Note:
- “/dev/ttyUSB1” – ttyUSB means “USB serial port adapter”
- The “1” (“0” or “1” or “2”“here means the USB device number on your system. The FPGA board is connected to that USB device number.
Terminal 3: Similarly open 32bit compatible RISC-V GDB, riscv-unknown-elf-gdb from shakti-tools. Load up the Zephyr elf file by following the below steps,
$ riscv32-unknown-elf-gdb
(gdb) set remotetimeout unlimited
(gdb) target remote localhost:3333
(gdb)file path/to/zephyr-rtos/samples/hello_world/build/zephyr/zephyr.elf
(gdb) load
(gdb) compare-sections #to see if any mismatch in copying sections
(gdb) continue or c
However if you face any errors from OpenOCD or mismatch, please reset the board. Then follow the steps again from section 1.4.
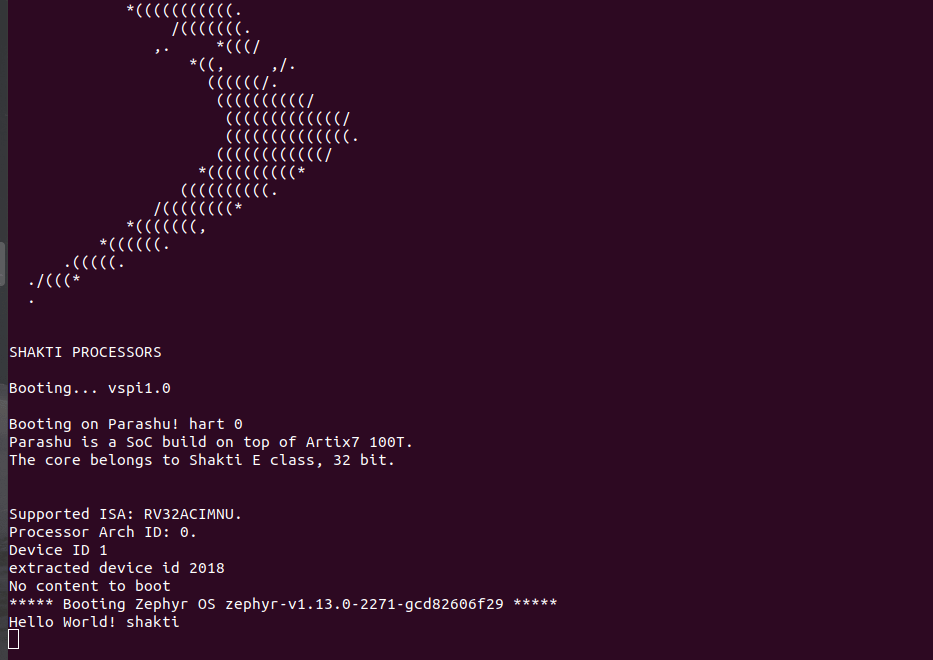
In conclusion, the output of should be as follows (Parashu – E Class on Arty7 100t),
Akshaya currently works at the RISE labs. Her favorite subjects are Web designing and Microprocessors. She loves learning about new things and writing about them!