In our previous post, SHAKTI Docker Series: Part 1 – How to Set Up a SHAKTI Development Environment with Docker, we walked through setting up a containerized development environment for working with SHAKTI processors using Docker. Now, in Part 2 of the series, we’ll take it a step further and you how to connect and configure an FPGA board with the same SHAKTI Docker setup.
For Linux based systems
If you followed all the steps in SHAKTI Docker Series Part 1, no additional configuration is necessary. The provided Docker Compose file already includes the settings required to attach the FPGA board’s USB interface to the Docker container
Starting the Docker Container
Use the following command to start the container:
$ sudo docker compose up -d⚠️ Note: If you create a container directly from the image instead of using the above docker compose command, the USB settings may not apply automatically. You would need to manually pass USB device permissions to the Docker container.
Verifying USB Connection Inside Docker
To check the FPGA USB connection inside Docker run the following command
$ lsusb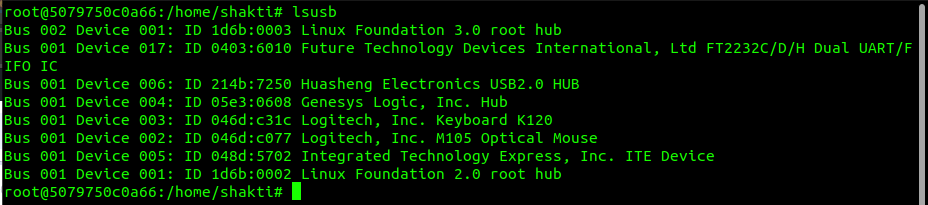
Look for the following line in the output:
Bus 001 Device 017: ID 0403:6010 Future Technology Devices International, Ltd FT2232C/D/H Dual UART/FIFO ICIf this device appears in the list, your setup is good to go!
For Windows based systems
For Windows users, a few additional steps are required to route USB devices from the host system to Docker running inside WSL (Windows Subsystem for Linux).
If you’re developing in WSL2 and need access to a physical USB device—such as a serial adapter, development board, or USB dongle—you can achieve this using usbipd-win.
Step 1: Search for the USBIPD Package with Winget
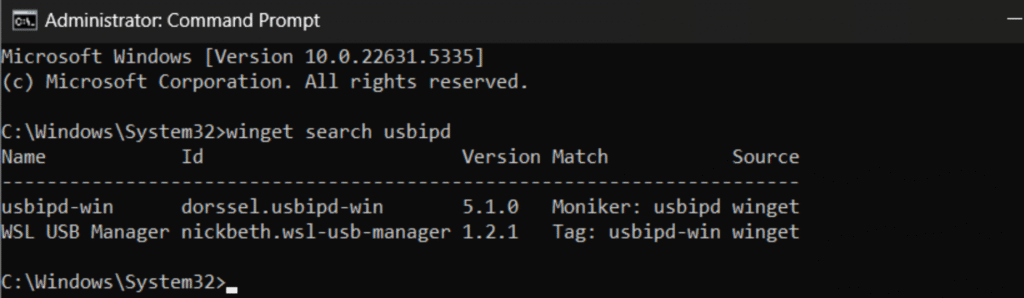
Open PowerShell (as Administrator) and search for the usbipd package
$ winget search usbipdThis should return a package similar to
Step 2: Install usbipd-win
$ winget install --id=dorssel.usbipd-win
Note: You may need to restart your system or log out and back in for the drivers to initialize properly.
Step 3: List USB Devices
Run the following command to see connected USB devices:
$ usbipd list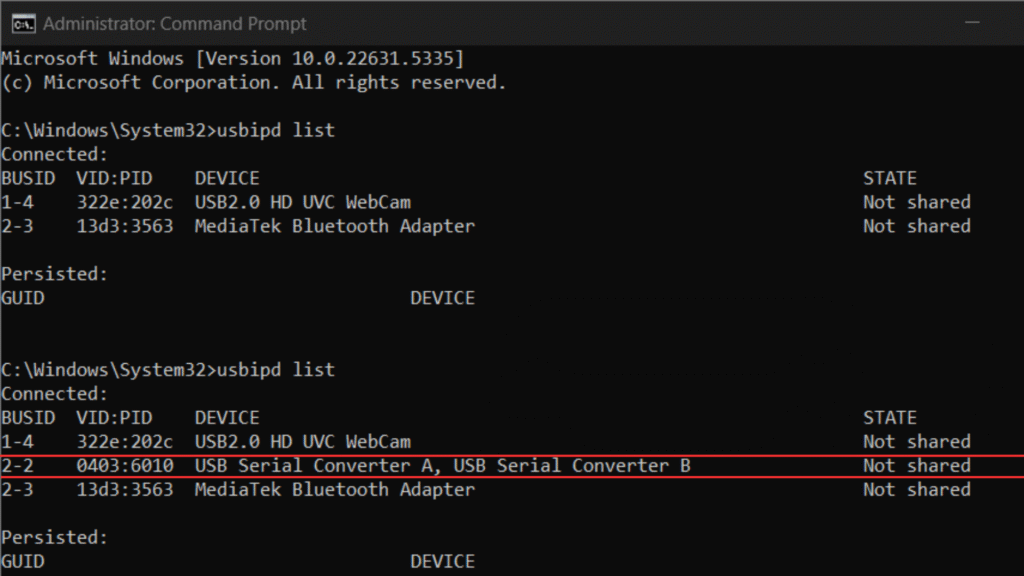
Figure: List before and after connecting FPGA
Step 4: Bind the USB Device to WSL
Before attaching, you must bind the USB device. Use the appropriate Bus ID from the previous step:
$ usbipd bind --busid 2-2 Step 5: Attach the USB Device to WSL
Ensure your WSL instance (e.g., Ubuntu-22.04) is running, then attach the device:
If you try to attach before bind, the terminal will throw the below error. So try bind and then attach

Next, attach the USB device to your WSL2 distro. Replace 2-1 with your device’s actual bus ID, and Ubuntu-22.04 with the name of your WSL distro:
$ usbipd attach --busid 2-2 --wsl Ubuntu-22.04If successful, your USB device will now be available inside the WSL2 instance.
Note : While doing this Ubuntu should be active or else you get the below error. To resolve keep the Ubuntu 22.04 WSL active and then try to attach

Verifying Inside WSL
Launch your WSL2 instance and verify that the USB device is recognized:
$ lsusb
If you see the FPGA board listed (e.g., FTDI 0403:6010), it is now successfully connected.
Conclusion
By following this guide, you now have a complete SHAKTI development setup—from Docker-based environments to FPGA board integration—allowing you to prototype, test, and run your SHAKTI projects more efficiently. With this setup, you’re ready to start developing and testing your SHAKTI projects on real hardware.
Stay tuned for the next part of the series, where we’ll explore running programs on the FPGA on SHAKTI inside Docker.
References
🔗 usbipd-win GitHub Repository
📖 Microsoft Docs: USBIP Support in WSL

Balaji is currently working in RISE Lab. He has a deep passion for tinkering with sensors and development boards..