In our previous post, SHAKTI Docker Series : Part 2 How to Set Up a FPGA board with SHAKTI Docker, we walked through setting up an FPGA board for working with SHAKTI processors using Docker. Now, in Part 3 of the series, we’ll take it a step further and show you how to run applications on an FPGA board using the same SHAKTI Docker setup.
Programming bitstream in FPGA board
Programming the FPGA involves loading a bitstream file (.bit), which contains the synthesized and implemented design.
Start the Container
$ sudo docker start shakti_container__Attach the container
$ sudo docker attach shakti_container__
To check the FPGA USB connection inside Docker run the following command
$ lsusb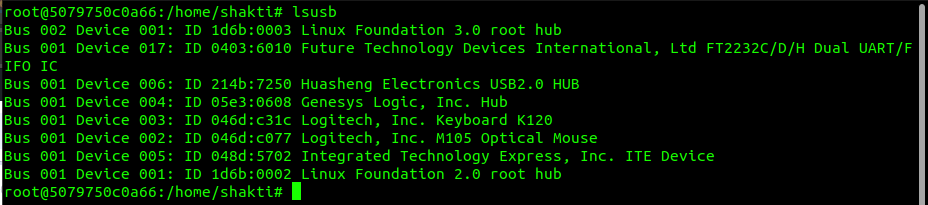
After executing the lsusb command, you should find the following line in the list:
Bus 001 Device 017: ID 0403:6010 Future Technology Devices International, Ltd FT2232C/D/H Dual UART/FIFO ICIf you see this, you’re good to go.
List all files in the current directory:
$ ls
To program FPGA with bitstream execute the below command
$ fpga_program <file.bit>Here, we use
$ fpga_program yamuna.bit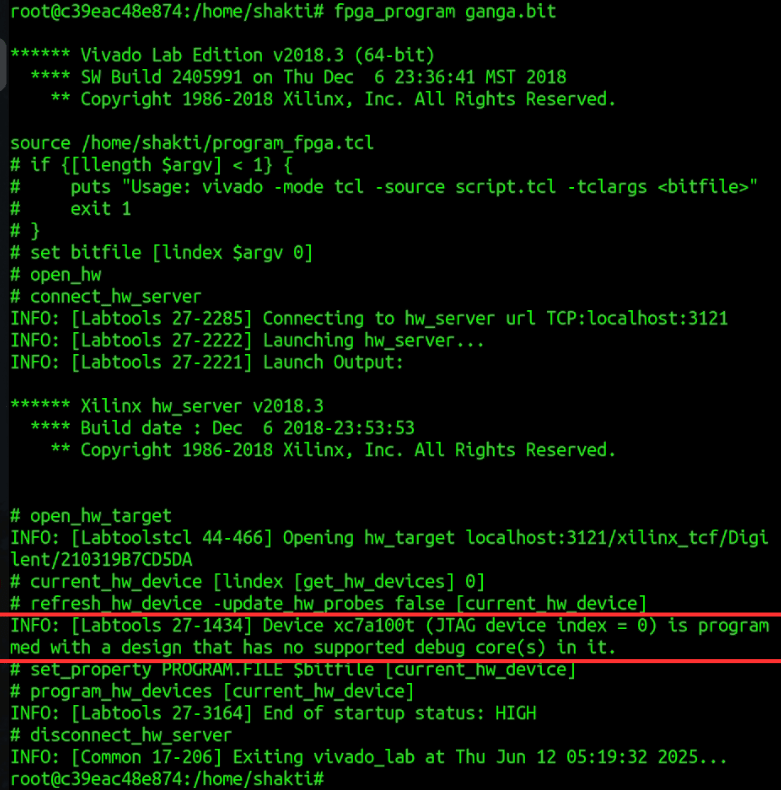
After successful execution, you should see:
INFO: [Labtools 27-1434] Device xc7a100t (JTAG device index = 0) is programmed with a design that has no supported debug core(s) in it.This indicates that the FPGA board has been programmed successfully.
Running Application on Shakti Docker
To run any application, execute the following command
$ split_screenThis will split the terminal into four terminals, we use the four terminals for
- A terminal to compile the code
- GDB – to run the binaries
- Openocd – to connect the target to run and debug binaries
- Minterm – to see the output of binaries
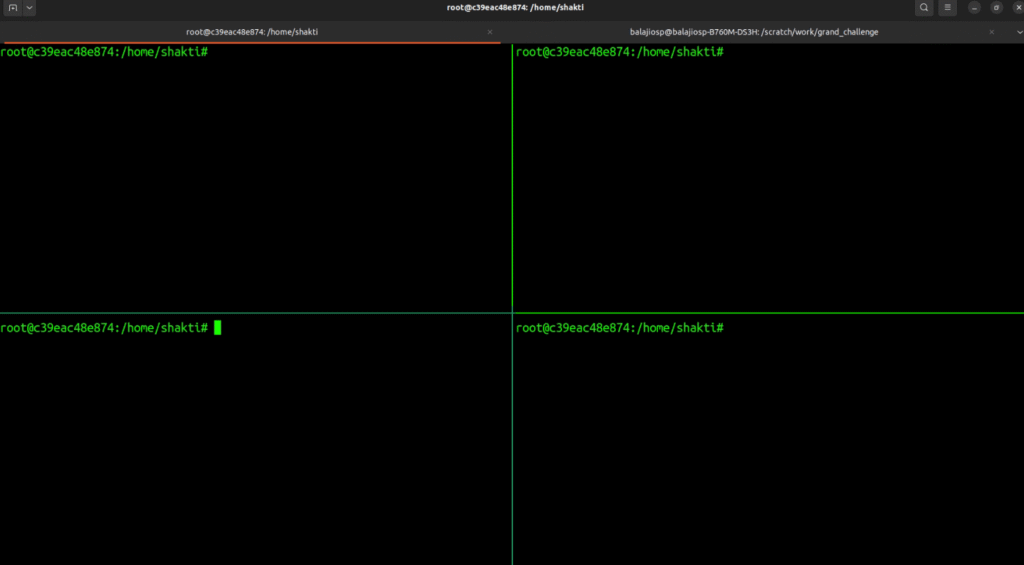
Note: split_screen is a custom command based on tmux to simplify multi-pane management. (tmux is a terminal multiplexer that lets you run and manage multiple terminal sessions within a single window)
Navigation Tips (tmux shortcuts):
- Use Ctrl-b + arrow keys to navigate between panes.
- Press Ctrl-b + o to cycle through panes in the current window.
- Switch to the next window with Ctrl-b + n.
- Switch to the previous window with Ctrl-b + p.
- Jump directly to a specific window using Ctrl-b + the window number.
Note: While navigating, press Ctrl + B and then Arrow keys to navigate through panes, not all at once
Compiling code
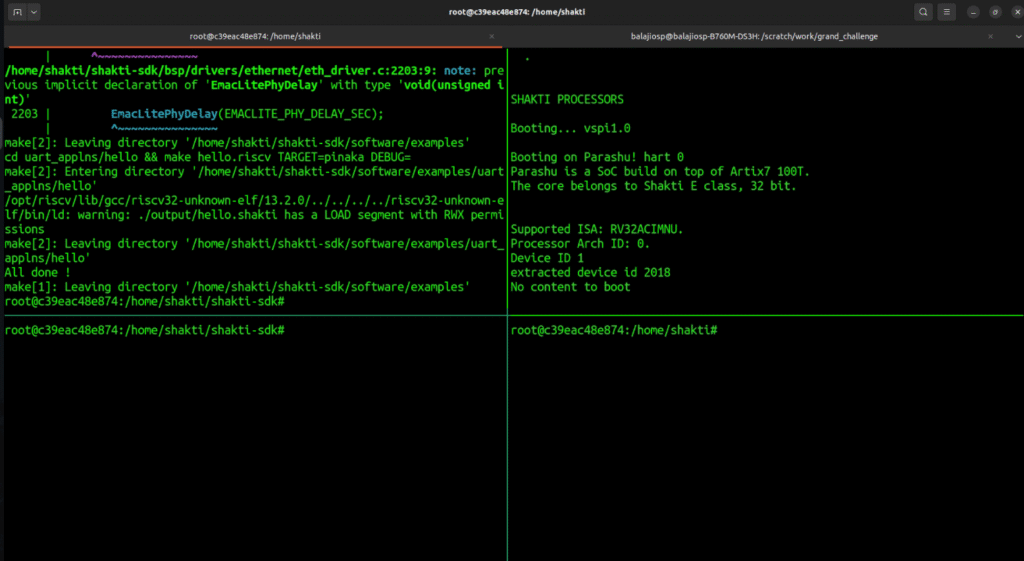
Here, we’ll compile and run a simple “Hello, World!” program from the shakti-sdk on the FPGA board.
$ cd shakti-sdk
$ make software PROGRAM=hello TARGET=yamuna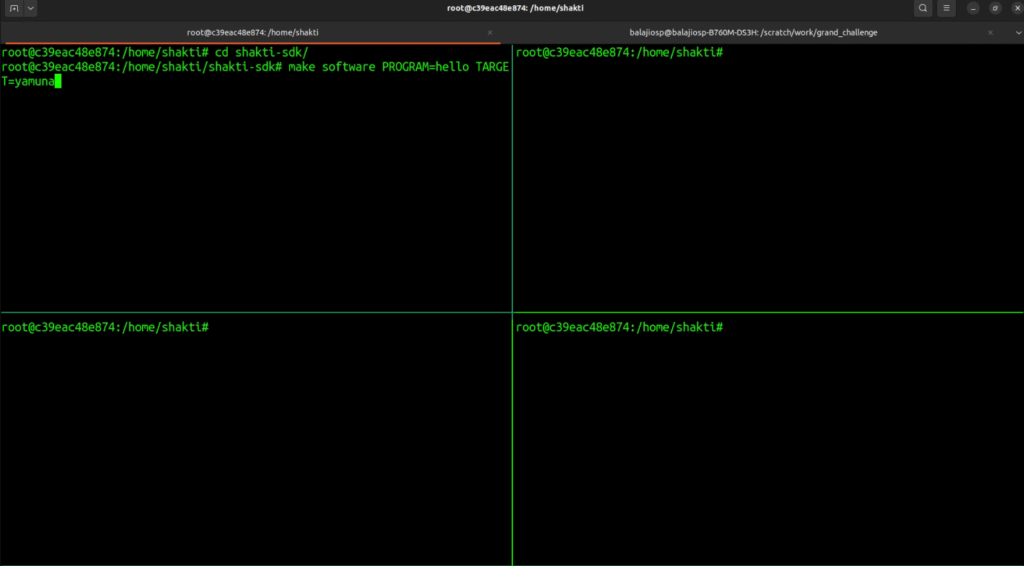
After execution, you should see:
All Done !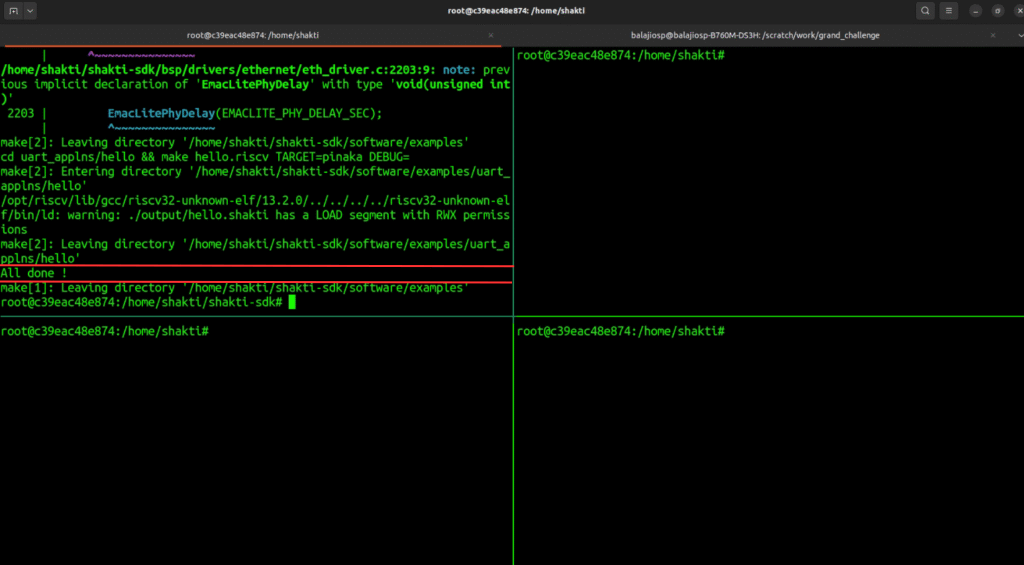
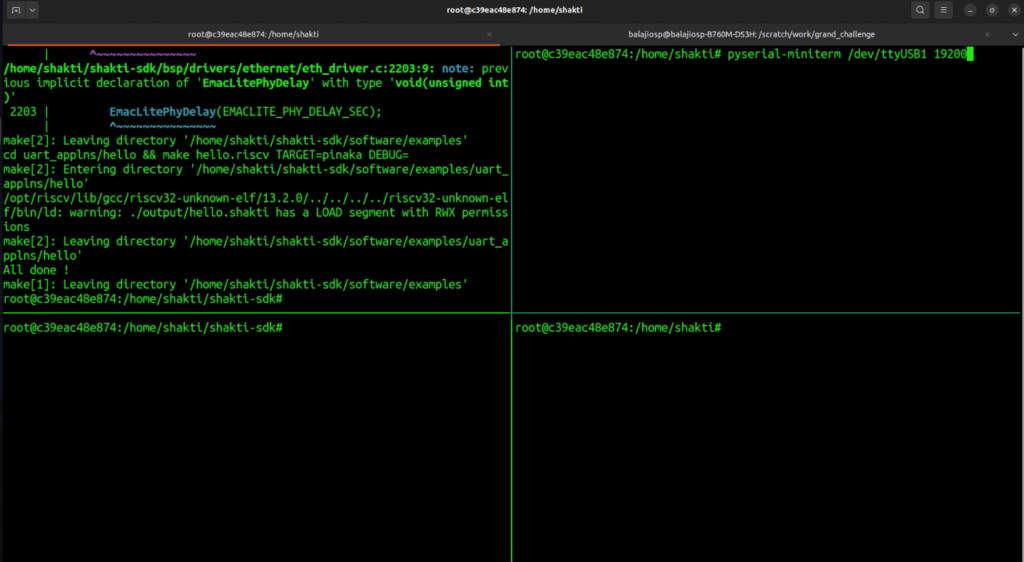
Miniterm Setup
Navigate to the right-side pane using:
Ctrl + B, then Right ArrowNote: Do Ctrl + B and then Arrow key not all at once
Run the following command
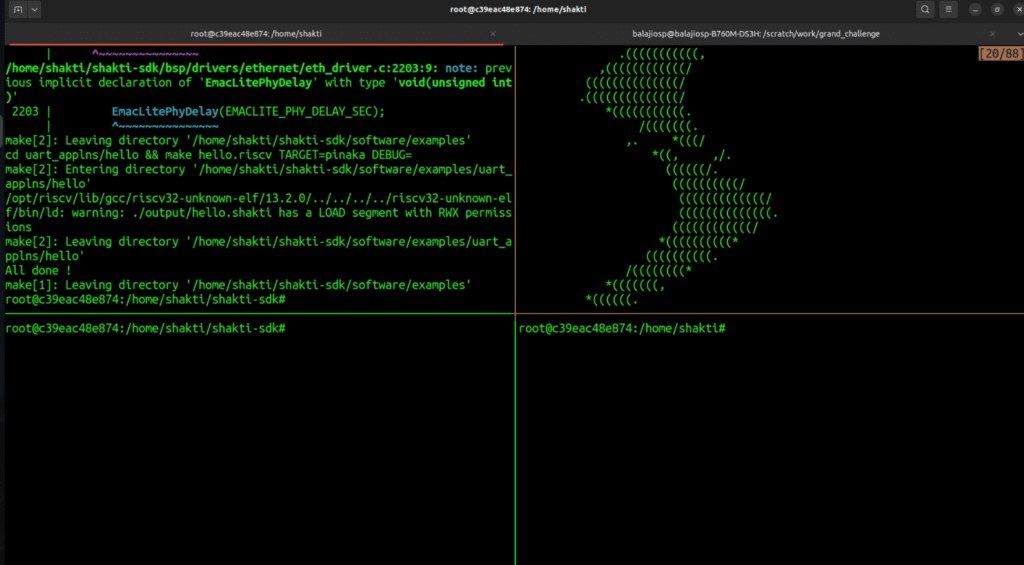
$ pyserial-miniterm /dev/ttyUSB1 19200Note: USBx may change, check that before proceeding with the command
If successful, you’ll see the SHAKTI logo, confirming everything is aligned.
Openocd Setup
Navigate to the third terminal
Ctrl + B, then Down Arrow → Ctrl + B, then Left ArrowRun the following commands
$ $(which openocd) -f shakti-sdk/bsp/third_party/yamuna/ftdi.cfg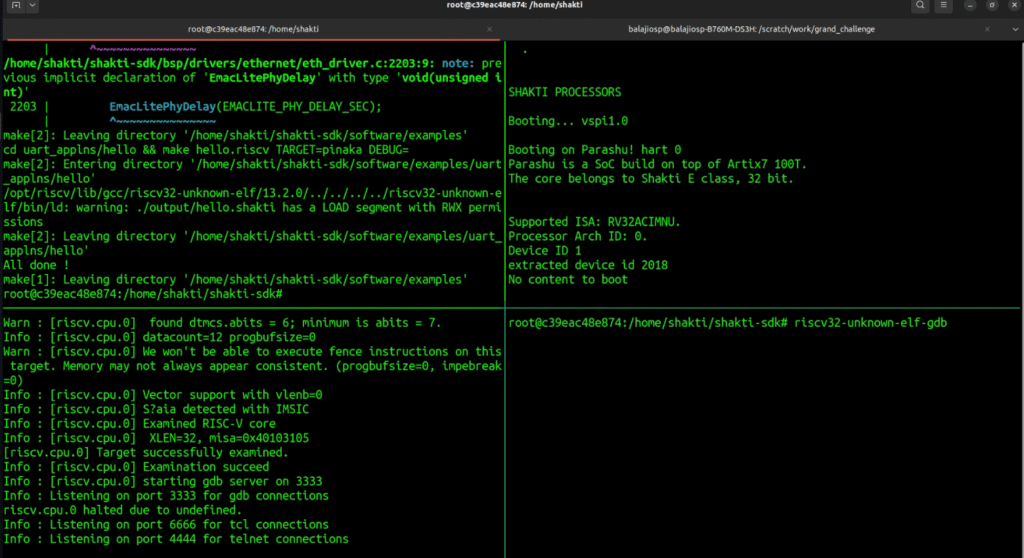
After executing the commands, you should be able to see the line Listening on the port 3333 for gdb connections.
GDB Setup
Navigate the fourth terminal
Ctrl + B, then Right ArrowRun the following commands
$ cd shakti-sdk
$ riscv32-unknown-elf-gdb
After that run following commands in gdb terminal
(gdb) source gdb.script
(gdb) file software/examples/uart_applns/hello/output/hello.shakti
(gdb) load
(gdb) c
Note: After source gdb.script you can notice the line accepting ‘gdb’ connection on tcp/3333 in openocd terminal
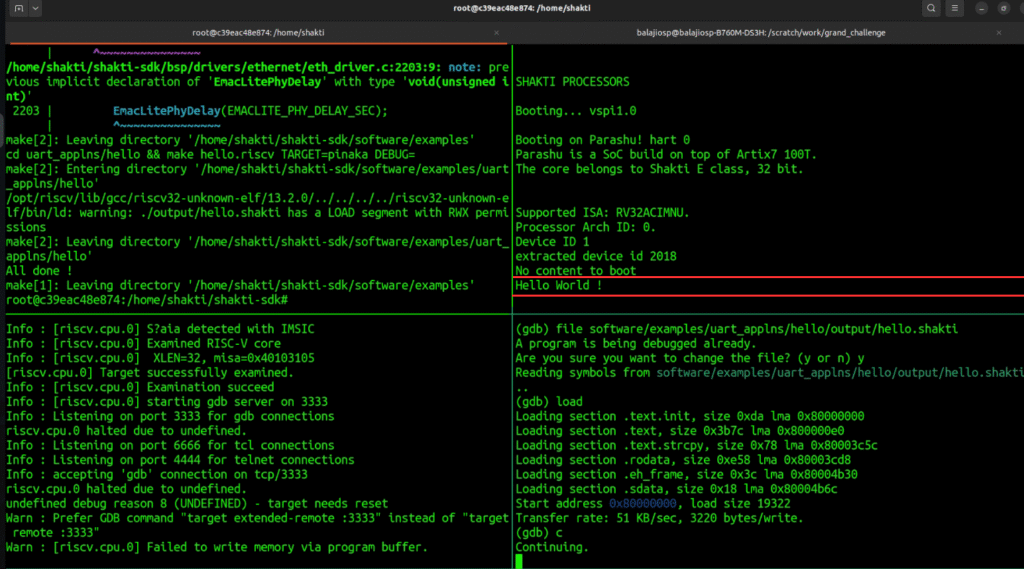
After executing all the commands, you should see the Hello World ! in the miniterm serial window
Conclusion
In this post, we learned how to run a basic application on the SHAKTI FPGA board using Docker. We covered how to program the board, set up the terminal, and run a “Hello, World!” program. With this setup, you’re now ready to start developing and testing your own applications on SHAKTI.
Stay tuned for the next part of the series!

Balaji is currently working in RISE Lab. He has a deep passion for tinkering with sensors and development boards..